| Gilded Prophecy | |
|---|---|
| GP | |
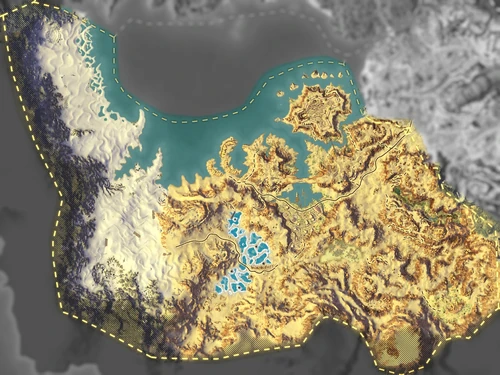
| Location | Shimmersand[7100,6909] |
| End boss | Uruluuk |
| Instance info | |
| Type | Raid |
| Advised level | 50 |
| Player limit | 10 |
Bosses
| |
Background[ | ]
Gilded Prophecy is a 10-man raid included with the 1.2 update and can be entered through a sliver in the Gildstone Sanctum in Shimmersand. It represents an alternate timeline where the Gildstone Sanctum has been overrun by the Plane of Earth.
Encounters[ | ]
Anrak The Foul[ | ]
Anrak The Foul is a giant scorpion, and needs to be tanked by two tanks due to a stacking debuff. Anrak himself gains a stacking buff causing him to do more damage, so a good balance between dps and healing has to be found. Anrak has a 7 minute enrage timer.
During his encounter there are a variety of things to watch out for:
Vicious Tail Strike
- The ability is a tail swipe but since this is a scorpion, tail swipe actually means he is bringing his tail forward, and oneshotting anybody who is in front of the boss. Melee should never be in front of the boss, and any tank can walk trough Anrak during the casting of his tail swipe ability.
Gaze
- Anrak will periodically gaze at a random raid member, inflicting quite a high amount of damage. This will require intensive single-target healing. The gaze is announced by a system message.
Call of Anrak
- Anrak summons adds, that have around 8k hitpoints and should be killed by ranged dps.
Spikes of Earth
- Every player will get a circle around itself, you need to make sure that these circles are not overlapping. If they overlap, the ticking damage will increase. This means the entire raid should be in spread positioning around the area.
Poison Bolt
- Below 50% Anrak will target a random player with a poison bolt, creating a green bubble around the player. This is a debuff that needs to be dispelled as soon as possible.
Defense AOE
- Around 45% Anrak will drop a circle on the floor increasing his defense. It's possible to DPS through this buff but if you have trouble beating the enrage timer, it's advised to kite Anrak out of this area.
Loot[ | ]
| Item Name | Type | Slot |
|---|---|---|
| [Ancient Ethian helm] | Chain Armor | Helmet |
| [Boots of the Scorpion] | Leather Armor | Feet |
| [Foul Band of Chitin] | Accessory | Ring |
| [Foul Chitin Necklace] | Accessory | Neck |
| [Foul Stinger] | Dagger | One Hand |
| [Gilded Maul] | Hammer | Two Handed |
| [Greathelm of Gluttony] | Plate Armor | Helmet |
| [Links of Gold] | Chain Armor | Belt |
| [Mace of Greed] | Mace | One Hand |
| [Mace of Longing] | Mace | One Hand |
| [Quantum Repeater] | Gun | Ranged |
| [Shoulderpads of Avarice] | Cloth Armor | Shoulders |
| [Spiked Chitin Breastplate] | Leather Armor | Chest |
| [Staff of Excess] | Staff | Two Handed |
| [Tainted Leggings] | Chain Armor | Legs |
Guurloth[ | ]
Guurloth is the second boss in the Gilded Prophecy and is mainly a check for following mechanics, and a slight DPS check as well. The enrage timer is 10 minutes (unconfirmed). It needs a main tank for Guurloth himself, and an off-tank for the adds he spawns.
There are four emotes Guurloth uses which all raid members need to react to (a 'Simon says' game):
- "Jump little fools!" will mean he casts Rumbling Earth, a spell doing pulsing aoe damage. Keep jumping to avoid taking damage. If you do take damage, wait a second before jumping again.
- "Run little fools!" means he casts Earthen Toll, just keep moving your character to avoid taking damage.
- "Dare you gaze upon the Orb of Power?" means: turn your character away to avoid looking at the orb he holds up.
- "<Name> will do nothing or you all suffer." If your name is called here, dont do anything. A good way might be to unselect your current target.
Of course there are other mechanics that happen while you have to look out for the emotes:
- Yellow rings will spawn on the floor, move away from them or crystals will spawn and do damage to the people standing in the ring.
- He will also periodically summon an add, which needs to be offtanked and killed. The add gets a damage buff when tanked too close to Guurloth. If the add is not killed quick enough, another add will spawn which will take a damage buff when tanked too close to the first add. The secondary add despawns once the first add dies.
- Later in the fight tornadoes spawn troughout the area which will increase in number and speed. By itself the tornado is not dangerous, but combined with other mechanics it can be very dangerous. Try to avoid getting caught in them.
- Every minute he will cast Boulder of Destruction on the tank, the tank needs to use a cooldown or have a cooldown places on him to avoid being one-shotted.
Loot[ | ]
| Item Name | Type | Slot |
|---|---|---|
| [Boots of the Earth] | Chain Armor | Feet |
| [Bulwark of Rapacity] | Shield | Off Hand |
| [Earthen Spaulders] | Chain Armor | Shoulders |
| [Earthshadow Tunic] | Leather Armor | Chest |
| [Gilded Greatbow of the Mountain] | Bow | Ranged |
| [Gilded Maul] | Hammer | Two Handed |
| [Gilded Skull] | Totem | Off Hand |
| [Mystical Diamond Ring] | Accessory | Ring |
| [Stoneplate Spaulders] | Plate Armor | Shoulders |
| [Thick Gold Belt] | Plate Armor | Belt |
Thalguur[ | ]
Thalguur is the third boss in the Gilded Prophecy, and is a heavy dps and healing check. Only one tank is needed. Thalguur gains a stacking buff that increases his damage done and decreases his damage taken.
One (non-tank) player will need to be chosen to pick up the Impressive Shovel that is glowing in the center at the start of the fight. This player will have a special task during the crystal phases (read below).
Main mechanics:
- He will focus his energy on a random player, which will cause heavy single-target damage. Healers be advised.
- Ground Pound is a raidwide AoE attack, which needs to be healed up quickly.
- He also does an almost instant knockback on a random player.
Crystal Phase:
At 90% (and 70%, 50%, 30%, 10%) he will knock over a pillar causing a large amount of crystals to spawn. These crystals provide buffs much like crystals in rifts. If a player does not click any crystals during a crystal phase, the buff will drop off. Each raid member should take about five crystals per phase to prevent running out of crystals and buffs from dropping off.
During these crystal phases, Thalguur will spawn ghosts adds (starting at one, increases each phase). The person assigned to pick up the shovel will now need to click one of the dirt mounds to uncover a treasure chest. One of the adds will run to the chest and despawn, repeat until there are no more adds up.
After the first crystal phase there will be two additional mechanics:
- Greed is Good: Thalguur casts a debuff on a random player that steals crystal buffs from surrounding players. This player will need to run out of the raid.
- A yellow beam will channel on a random player from one of the broken pillars. This player needs to run to the pillar as fast as possible, to prevent the whole raid from getting a healing debuff. If the player is at the pillar in time, only he/she will get the healing debuff and all is good.
Loot[ | ]
| Item Name | Type | Slot |
|---|---|---|
| [Aegis of the Earthlords] | Shield | Off Hand |
| [Crown of the Golden Empire] | Chain Armor | Helmet |
| [Crystal Gloves] | Cloth Armor | Gloves |
| [Earthshadow Gloves] | Leather Armor | Gloves |
| [Fatecrusher] | Mace | One Hand |
| [Gilded Axe of Legend] | Axe | One Hand |
| [Golden Battleplate of the Emperor] | Plate Armor | Chest |
| [Golden Bauble] | Totem | Off Hand |
| [Golden Elemental Boots] | Chain Armor | Feet |
| [Impressive Shovel] | Hammer | Two Handed |
| [Intimidating Shovel] | Hammer | Two Handed |
| [Lodestone Ring] | Accessory | Ring |
| [Shining Amethyst Necklace] | Accessory | Neck |
| [Shining Greaves of Destruction] | Plate Armor | Legs |
| [Spiked Platinum Cord] | Leather Armor | Belt |
| [Wand of Excess] | Earth Wand | Ranged |
Uruluuk[ | ]
Uruluuk is the last boss in the Gilded Prophecy. It has a 10 minute enrage timer.
Ground Phase Abilities
- Explosive Crystal - Targeted attack that creates AOE damage to surrounding players, so spread out.
- Crumbling Boulders - Full-raid AOE damage, needs to be healed up immediately.
- Crystallize - He crystallizes a player, which once crystallized heals the boss significantly. A targeted player needs to move away from the boss to prevent this from happening. The crystal then can be broken.
- Storm Power - The whole raid needs to be inside his ability radius
- Fist of Lapis - Targeted attack that can be interrupted or reflected.
He will port up into the air, the entire raid should move to the crystal in the center. He will emote he is throwing a massive boulder on a player. At this time a green crystal will fall on that player, the rest of the raid needs to stand in the green bubble that it spawns. Two adds spawn inside the bubble which needs to picked up to prevent them from destroying the green crystal. It is advised that ll raid members run back to Uruluuk's center alter near the base of the stairs for the shield phase, due to Uruluuks spawning there after the phase has finished. During the sheilded crystal phase the raid will require a large amount of healing, so healers be prepared. After 10 or so seconds Uruluuk will teleport back down take increased damage for 20 seconds, this would be an excelent time to use two or three minute cooldowns, flaring power and other larger cooldowns should be saved for the final phase.
After Uruluuk loses his vulnerability to damage, three Idols will spawn a little past the foot of the stairs, these need to be killed as quickly as possible. While you stand in the bubble style aura given off by the icons you will gain a damage buff that stacks up to ten times; keep it at 10 as much as possible. Uruluuk will also be gaining purgeable buffs while the icons are active, so have a dedicated purger assigned to cleansing his buffs or else the damage on the tank, and the raid, will become unmanageable. After the icons are dead phase one will start again, with the exception of the two adds from the shield phase, you can choose to DPS them down or not, their damage isn't much. And at 30% phase three will begin. It is also adviseable that if Uruluuk is at about 32% and already teleported three times that you wait for him to go back to the air phase, and refrain from DPSing him during his vulnerability, for fear of during him into phase three while the icons are active.
During Phase Three Uruluuk will teleport to the top of the stairs and become untankable, this is the time to use long cooldown abilities, due to the massive amounts of raid damage that will be coming out. Uruluuk will begin casting Fist of Lapis on random raid members, not only the tank, so Dominators/interupters be prepared for this. Uruluuk will spam semi-hard hitting attacks at the raid while using Fist of Lapis occasionally and keep using Crumbling Boulders on the raid about every 10-20 seconds. Uruluuk will also have Skeleton adds begin to spawn down in the common area and they will occasionally grow larger, get a crown over their heads, and come at the raid. This is where your purger should come in and purge the buff off the the skeleton, making it return to the button area and become passive once more. This is a dps and healing race, until Uruluuk is dead.
Loot[ | ]
| Item Name | Type | Slot |
|---|---|---|
| [Ceremonial Shield] | Shield | Off Hand |
| [Dirty Earthen Ring] | Accessory | Ring |
| [Earthshadow Belt] | Leather Armor | Belt |
| [Earthspike Boots] | Plate Armor | Feet |
| [Glyphed Pauldrons] | T3 Token | Shoulder |
| [God-King's Scepter] | Earth Wand | Ranged |
| [Goldweave Cord] | Cloth Armor | Belt |
| [Guise of the Gilded Path] | Chain Armor | Helmet |
| [Sacrificial Platinum Blade] | Dagger | One Hand |
| [Shimmering Necklace of Destruction] | Accessory | Neck |
| [Totem of Uruluuk] | Accessory | Trinket |
| [Trousers of Craving] | Leather Armor | Legs |
| [Uruluuk's Staff] | Staff | Two Handed |
Videos[ | ]
Gilded Prophecy - Anrak The Foul Guide
Gilded Prophecy - Guurloth Guide
Gilded Prophecy - Uruluuk Guide
Gilded Prophecy - Thalguur Guide